Monday, February 5, 2018

Adventures in vinyl cutting- Oracal 651!

Because I refuse to ever utter the words "I'm bored," I've come up with yet another hobby!  In my quest to find ways to get more use out of the Pazzle Creative Cutter Pro, I've taken up vinyl cutting.
It started off innocently enough- we signed up to do a craft sale before Christmas, and I decided to make some Christmas themed wine glasses.  I ended up with these:


From there, I stretched myself a little bit and started experimenting with some other vinyl designs and I even layered some vinyl:


I started down a rabbit hole of vinyl--- and I discovered HTV (heat transfer vinyl) and fell in love!  That's a post for a different day....

Problem: I had absolutely no idea what the heck I was doing.  So, I thought maybe I'll share some of my tips and tricks to help a fellow crafting "wannabe". 

For cutting, I use either a Cricut Expression (with the cartridges) or a Pazzle Creative Cutter Pro.  I love the Pro for designing my own creations, but it's ALL THE WAY down the driveway at my mom's house, and sometimes I am just so lazy I don't want to walk.  The Dalek in the picture above (for those of you that don't do Dr Who, it's the blue thing) I actually cut by hand with an exacto knife.  Not recommend, unless you're a fan of hand cramping.

The permanent vinyl I used for all of the above projects is Oracal 651 vinyl, found here.  It's available in SO MANY colors.  There is also a more removable type of Oracal vinyl, but I haven't found a reason I'd want to use that.  Probably for walls, but I have textured walls at my house and things don't stick very well to those.
KEEP IN MIND- if you are making glasses, they need to STAY OUT OF THE DISHWASHER!  From experience (not my experience), you will end up with a plain glass when the dishwasher cycle is finished.  Not cool.

Using this vinyl is pretty straight forward.  I set my Cricut to 6, stuck the vinyl down on the medium (green) mat, and let her go!  To cut the vinyl on the Pazzle, I set the pressure at 100 and a couple of times I had to hit copy to give it another pass with the blade.
The first time I did it, I plucked out the image and stuck it on the glass.  Dumb move.  Don't do that.

INSTEAD:
Cut around your image (but be careful not to cut through your image accidentally- yes, I've also done that when I sampled some wine out of a glass I had created....) leaving a border.  Remove the other stuff you don't want off the mat.  You'll be left with a chunk of vinyl on the mat.  Weed the design.  This just means that you pull the unwanted parts off the backing.  This includes the insides of letters.  I have to get a lamp to do this in the future, because it's very hard to see all the little parts.  Throw that stuff in the garbage.  You should be left with the backing and your letters or image.  Then, take the transfer tape (found here) and rub it over your design.  Rub hard!
Peel up the transfer tape, and your image should be stuck to it.  Then, stick it to your project.  It's really that easy!!!

I got braver after doing several wine glasses and cut some with some pretty curly fonts.  Those stunk and were very stressful.  I would start out with block letters or easy to cut fonts and work your way up to the curly fonts.  This one was especially bad, as those Js, Gs, and Ks were an absolute pain in the butt:

Yes- this was a special order!
These were much easier:


Next up:
HEAT TRANSFER VINYL- Oh my gosh!!!  The possibilities are endless!

Saturday, May 21, 2016

A weekend to work!

This hardly ever happens!  It's springtime, the weather is beautiful, and I have an entire weekend to work!  My only commitments for the entire weekend are picking my daughter up on Sunday and a community band function on Saturday morning.  This is a total rarity.  So, I got dirty and busy.... and now (it's Saturday night) I have pushed my poor body as far as it will go.  I fear I have collapsed in a pile.  So, I thought I'd blog a little until I gain my second wind!
I cleared out my front flower bed on Friday (I had a vacation day because I was SUPPOSED to go to Chicago to a hockey tournament this weekend, but that fell through) and got it ready for some new plants.


Then, I realized my poor snap peas needed to be liberated from their weedy neighbors.  While I was over in that garden, I saw that my raised strawberry bed was looking a little crowded, too.  My issue weeds there are nettles (and I react ALOT to nettle stings) and morning glories.  The morning glories are a nightmare, and they twist around and choke ANYTHING they can get a hold of.  I did my best....


I started repotting some of the plants in my greenhouse, and realized that I had better start hardening some of those plants off.  If I want them to be ready for new homes, I'd better get going!  Yesterday (Friday) was our official average last frost date (or pretty close to it... and I count conservatively after losing all my plants one year!) so I'm not too far behind.  The thing I'm not happy about is the plants are still so small.  I think I need to bump the dates on all the seed packages up about 3 weeks, because while they will all be perfect for planting in my garden, they are so puny I feel bad selling them.  Though, I know that they will grow big fast as soon as they get in the warm soil in their "forever home".


Monday, March 21, 2016

Vermicomposting 101

Vermicomposting 101

The optimal temperature for a worm bin is 55 to 75 degrees F.


A little about me

I started worm composting about 6 years ago while working at an elementary school as a teaching assistant, mainly to show the students how decomposition works.  It was a fun experience, and the students had a blast learning about worms.  I purchased my first worm bin to get started rather than making one.

Where I got my worms

I bought my first batch of worms from a bait shop, and they ended up being quite expensive when purchased in such small quantities.  My first batch of worms lasted four years- but I forgot to bring them inside one cold fall and they were no match for the Wisconsin winter.  My current batch of worms were purchased at a Garden Expo from Growing Power two years ago.  They are currently thriving!

Some of my favorite links about vermicomposting:

Worm bin basics

http://www.motherearthnews.com/organic-gardening/

Worm bin pests

This website describes various pests that you might see in your worm bin:
http://www.wormfarmingrevealed.com/wormfarmingpests.html
This website talks about little white worms that might appear:
http://www.wormfarmingsecrets.com/worm-pests-predators/white-worms-pot-worms-in-worm-composting/
Here is a website discussing mites:
http://www.redwormcomposting.com/reader-questions/how-to-get-rid-of-worm-bin-mites/ 

Make your own worm bin

http://compost.css.cornell.edu/worms/steps.html
http://www.wikihow.com/Make-a-Worm-Compost-System

My adventures in worm composting

http://thiscountrylifewisconsin.blogspot.com/2013/03/working-with-worms.html 


2016 LGGG Vermicomposting Presentation

Friday, January 1, 2016

Throwback to last spring....

I started a post last spring about some of my trials, but didn't have a chance to finish it.  And, there it sat, dormant in the drafts folder, until I discovered it today.  I love looking back on the pictures from last spring when we're in the midst of a gloomy and dreary stretch of winter.  No holidays to look forward to and no life around us.  It's the best time to look back and make a plan.  
Last spring I was scrambling to finish up the greenhouse and get things organized.  This spring I am excited to have a new tiller and a place to work right away when it starts to thaw.  And, I became a Master Gardener Volunteer over the course of last year, so I'm excited to have a lot of new knowledge!

Cukes- two different types!

A peony and daffodils announce the arrival of spring!

 Caladium~ I planted them, but had no idea how these things were going to grow.  I was surprised to see these crazy spikes emerge from the soil.  These ended up being a win!  They were big and beautiful.  I should start them a little earlier next year.

Thursday, April 30, 2015

The World Comes Alive

After a long, dormant winter, it's so nice to see green again.  I really believe that those of us in the northern climates appreciate the cycling of seasons more than anyone.  When it's twenty below zero outside, all you can think about is warmth.  So, when that first 50 degree day hits.... we become fools.  We're outside in t-shirts and shorts. Let's just say that we appreciate the warmth.

The zinnia were very easy to start and grew quickly.  The impatiens were not as easy to start from seed.  They are one of my favorite flowers, so I'd really like to try starting them another way next year.  I'll have to research a little better for next year.


I also decided to take advantage of the greenhouse and I planted two hanging baskets so they will have time to fill out and look great.  I also plan on trying to start more of these kinds of plants from seed next year.  For this year, I'm just getting an idea of how warm the greenhouse gets and what I can get away with keeping in it.  It took me two weeks just organizing and figuring out how the shelves fit best.  I'm a slow learner!


Wednesday, April 15, 2015

Here Comes the Sun!

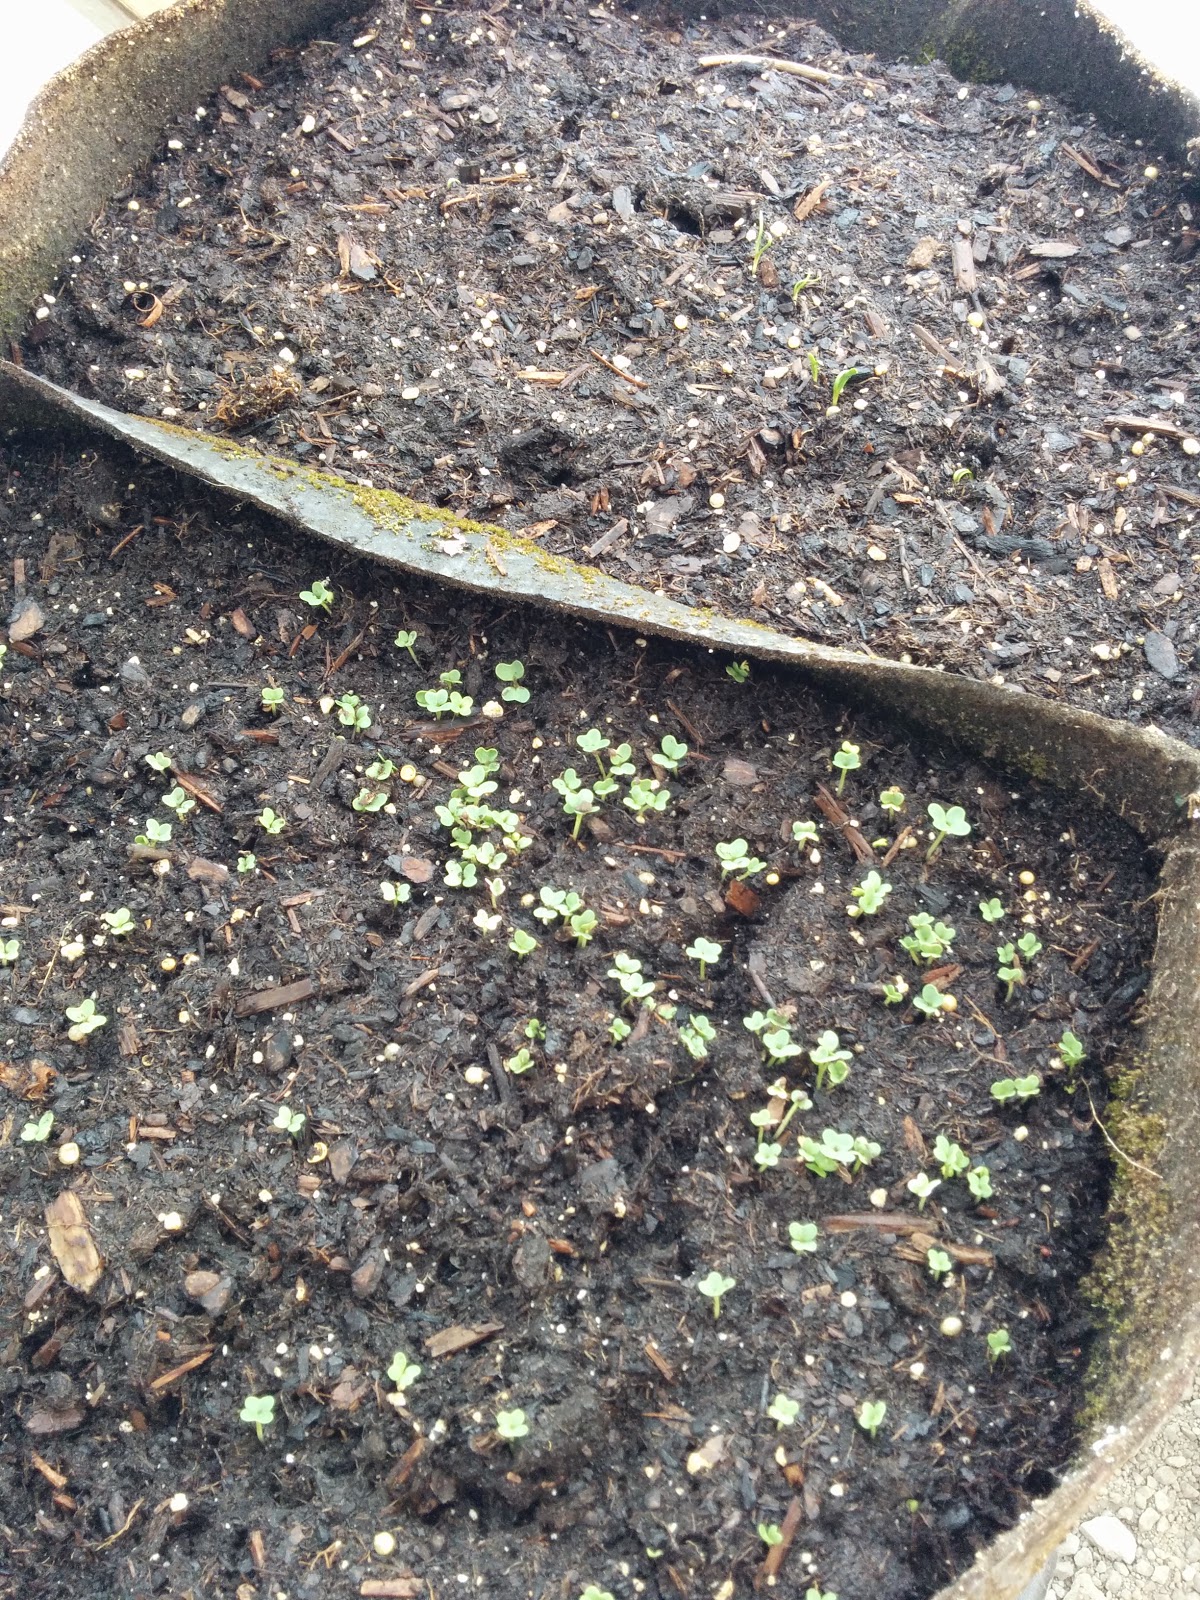
Things in Wisconsin have been heating up, but we know that spring always has a little more cold and blustery weather in store for us.  It sure didn't stop me from enjoying the last week or two of glorious temperatures.  The container of mustard, spinach and bok choy also enjoyed the warm temperatures, and I was rewarded by them growing much larger in just a short amount of time.


I also got some work done outside, though fighting through the nettles is getting quite old and summer has hardly even started!  I get terrible reactions to nettles, so I avoid contact whenever possible.  The issue is when the nettle roots are under the soil, and I don't even see them until it's too late and I have a welt on my hand that starts blistering within a couple of hours.  I'm not sure if I mentioned that I HATE nettles.  This raised bed had a TON of nettles in it, and I worked for an hour to get it cleared enough to plant some carrots that I had left over from last year.


Saturday, April 4, 2015

Let's get it started....

I worked on getting things organized over the last few weeks, and it's looking great in the greenhouse.  I'm still working on my layout.... I'll set things up one way and then decide I want to try something else completely different.  So, I'm still working on my organizational skills.


 The one constant is the temperature difference.  I don't have any kind of heater in the greenhouse yet (that will come next year) but it's been warm enough for the seeds to get started and for the seedlings to keep from freezing.


Other than a few things coming up in my self watering planter that has spinach, bok choy, and mustard in it things are pretty quiet.  Hopefully they will emerge in the next couple of weeks!


Saturday, March 21, 2015

Working in the Greenhouse

HAPPY FIRST DAY OF SPRING!

Little by little, I'm getting things organized this spring.  I'm about a week or two behind schedule getting my things started, but I don't think I'm as far behind as I was last year.  At various times this past week, I had a chance to spend little bits of time out in the greenhouse.
One of the first things that I put out there was a dual thermometer.  I have one sensor outside of the greenhouse and the other inside.  The temperature difference today was pretty amazing.  It was almost TOO HOT in the greenhouse, if there is such a thing.  I don't yet have a heater in there, so the fact that I was sweating made me realize how badly I need to get some black spray paint and get some heat sinks set up.  My plan is to paint some buckets of water black to "save" heat at night.  This picture was from a little earlier in the day; later it climbed to 79 degrees!

14 degree difference in temperature!

I did a lot of organizing today.  I got out some trays and brought them up to the house so I could work on starting some things when watching over my sick kid.  I started 12 each of True Lavender and Lavender Lady.  I also started a flat that had impatiens.  Those are in my dining room (and I fear that Tim won't be overly impressed when he gets home) because without a heater in the greenhouse, it's still too cold.
In the greenhouse, I started a container of Olympia Hybrid spinach and some Bok Choy.  I'm curious if the cold weather plants will be fine in the greenhouse with just the daytime heat.

Chicken guardian for the greenhouse
Organizing


Dual outlet timer

Light stands are ready for action!
More organizing and prepping hanging baskets


Saturday, November 22, 2014

A new adventure....

I started with outside gardening, moved to seedstarting under lights in my dining room, and now I'm taking the next step....


Today we finally got the glazing on the greenhouse!  I decided, after four years of research, to go with the Solexx 3.5mm glazing.  The light is supposed to diffuse better and it looked easy enough to install.  I ordered 4X12 foot panels of glazing to put on our prebuilt structure.  It ended up costing about $516 for the panels and then another $100 for the screws with neoprene washers and segments of u-channel for the tops and and the sides along the shed.

The entire thing started a little slowly.  We had a hard time sneaking the panel with the u-channel up under the soffet of the pole shed.  But, after we got the first panel up, we worked out a method that went pretty quickly.  We put the front three panels on first, overlapping them and putting a few screws in to hold it steady as we worked.


We got the last panel up on the front, and then started the side panels.  The front panels didn't even need to be cut, but the side panels did.  They cut pretty easily with a utility knife.  The hard part was caulking the ends without caulk getting all over the place.  We only used one tube of caulk for the entire thing.


The last side went up more quickly, as we got a method down.  The open end had to get caulked along the top to keep the air trapped in the flutes and improve the insulation of the Solexx panels.  I'm excited to see how the panels work, as they are supposed to last several years.  The wood on the floor of the greenhouse is the bridging that we eventually put up horizontally between the main beams.

And, finally, we have a GREENHOUSE!!!

Tuesday, July 1, 2014

I missed SPRING!

Well, this is terribly embarrassing.  I seem to have missed spring this year.  I can make excuse after excuse about how it happened.  I started a new job this year and I wasn't quite used to my new responsibilities.  No, that's not it.  My kids played spring sports this year (lacrosse, hockey AND soccer).  Well, that's probably a little closer, but still not an excuse.  It also may have been my bathroom remodel project.
Anyway, I started ONLY five trays of seeds this year.  Summer Sun tomatoes, basil, parsley, eggplant, King of the North Heirloom peppers, and some flowers.

Luckily, they were planted in self watering seed starting containers, because they got ignored for most of the spring.  They grew big and strong!  And then, the end of the school year HIT!  So, I'm still putting plants in the ground and it's July.  I haven't gotten my deck planters done yet.  I'm big time BEHIND!
But, luckily we planted a few flowers to give me some hope.
And, I always have my trusty fruit trees.  It's a great year for cherries!  So, enjoy some pictures of what I DO have in my garden, while I lament about all that I don't have in my garden.
Mandevilla- My favorite!
Dahlia
New Guinea Impatiens


Loads of cherries
I just know something amazing is going to happen!


Monday, February 17, 2014

Hard to think about planting....

... but it won't be long at all. In fact, I'm getting so many seed catalogs in the mail, it's hard not to make a plan for the garden. But for right this second, my garden sits and patiently waits.

Tuesday, July 16, 2013

I'm going to whip up some pesto!

I harvested a lot of basil today!  My plants were getting rather tall and I wanted to have them fill out a bit.  This year, I have been doing a better job and trimming them down so they don't get so tall.  I like them a little more "bushlike" in stature.
Here is a wonderful blog post to explain how to properly trim and harvest your basil:
http://mybyrdhouse.blogspot.com/2008/07/basil-pruning-tutorial-really.html

So, I started with my lovely pile of basil... and I thought I could walk you through the steps f how I make my pesto.  The above blog also has a recipe, but I don't do well with recipes.  I'm just a lazy cook.

Step #1:  Pick the basil
Here is just an example of what I got off of a "twin" basil plant.  That just means that I did a bad job thinning them as seedlings, and just planted two plants in the same hole when transplanting into my raised container.  This is a big pile of basil.  Just to give you an idea of how big, check out the vitamin water bottle in the top right corner.  I still have the plants growing strong outside.


Step #2: Wash the basil
If you grow basil, spinach, or lettuce~ you NEED a salad spinner.  I don't even know how much I paid for mine, but it is worth a lot.  I hate hitting dirt when eating lettuce or spinach, and it works well for washing basil, too!  


Step #3: Get out your ingredients
I am freezing my pesto this time around, so I'm only adding oil to the basil.  A good food processor makes a heap of difference when you're making pesto.  I borrow my mom's.  It's an oldie, but a goodie.


Step #4: Process away!
I use a spatula to scrape the basil leaves down every so often.  It smells so good!


Step #5: Ta-da


Step #6: Freeze
You can either eat it fresh or freeze for later.  I am going to add pine nuts and Parmesan cheese when I thaw and use my pesto, but I've heard that the cheese doesn't freeze nicely.  I don't know about that for sure, but I don't have any this time around, so I'm not even going to try it.