Friday, March 29, 2013

More seeds!

I have some great things going on in my dining room!
Seed starting things, of course.... I don't cook.


This week I was able to get my tomatoes planted.  I started seven different types of tomatoes, six of which were heirloom varieties from Seed Savers Exchange.  I planted all different types of tomatoes; from red to yellow.  All of them are dusted with cinnamon in the above photo, to help ward off disease.


I've just started my seeds, but already I'm thinking about them outgrowing the little cells that they are in.  This weekend, I went to Farm and Fleet and bought pots to replant my seedlings into.  I'm trying to water all my plants from the bottom.  These pots are going to be perfect for that... and I've finally found a use for the aluminum trays that were salvaged from a Christmas party two years ago.  I just need to buy some medium to put in them and they'll be ready for my transplants.


I also planted Genovese Basil, cabbage, Romanesco Broccoli, and coriander.  Since everything was just planted this week, I need to be patient and wait for it to germinate.  I'm not very good at being patient. 

Saturday, March 9, 2013

Testing 2 Products

This year, I purchased two different products from Gardener's Supply Company that I'm going to test against each other.

Product #1:  The APS Starter Seedstarter Kit
http://www.gardeners.com/APS-Starter-Kit/32-573,default,pd.html?start=1&cgid=SeedstartingKits_Cat


This kit included a bag of seedstarting medium (you can kind of see it off to the left), two self-watering trays, plant markers, water level indicators, and a seedling fertilizer.

Product #2: Fast Start Success Kit
http://www.gardeners.com/Fast-Start-%23174%3B-Success-Kit/40-274,default,pd.html?start=8&cgid=SeedstartingKits_Cat


This kit is on the right had side of the picture.  It came with a brick of coconut coir, two self watering trays, plant markers, and seedling fertilizer.

My goal is to start the same exact plants in each kit, to see which one I like better.  I'll keep the lighting the same, the temp the same, and the seeds the same.  It'll be like a little experiment!

Peppers!

Today I started some pepper plants!
I want them to get nice and big before taking them outside, so I started them a little earlier than I normally would.  I am doing a trial between two different seed starting kits that Gardener's Supply offers.  So, I decided to start three seeds in each cell.  I planted three cells of each kind of pepper in each of the two different types of kit.  So, that will give me six plants when all is said and done.
So, first I got both the kits out and made a plan.


Next, I carefully read the directions for each kit.  I'm sometimes not very good at reading directions.  I set out each kit.


The most time consuming part was filling the cells with the planting medium.  The top kit came with coconut coir, which I find pretty hard to work with.  It takes time to let it soak in a bucket of water.... and I'm not very patient.  The bottom kit comes with a germinating soil mix.  I thought it was way easier to work with.  But, I used more of it.
I finally got everything planted.  Both kits feature capillary mats that water from the bottom.  The bottom kit also has a water gauge, but I found it hard to get to sit upright.  If it's lying down, it's not going to be very useful.  I popped the tops on, and put them in the grow stand.  The package says that germination time is 14 days.  I got the seeds from Seed Savers Exchange.  Now it's the waiting game.


Tuesday, March 5, 2013

Project: Seed Organization


Here is the photo of the way that I stored my extra seeds from last year.
I had some empty packets, so I could remember what varieties I grew last year.  I had full packets.  I had ripped open packets.  I had flowers and veggies and herbs.
It was a mess.

Here is my new organizer, from seedkeepercompany.com.  I tried to make my own.  I bought a plastic container and some alphabet tabs.  Fail.  They weren't the right size or shape.  After I decided that trial and error was NOT going to be cheaper than just buying it, I ordered the seed keeper.
It's awesome!  I have the seeds organized alphabetically.  Now that I see what they use for the divider, I can make another one for my flower seeds and bulbs.  When I start using up the seeds, I can use the extra space to keep receipts and tags from my fruit trees.

Sunday, March 3, 2013

My wonderful gift!

My husband is amazing. Yesterday, we had a free Saturday.  No hockey, no school commitments, no place that we had to be.  I used yesterday as my blow-off day.  The finished reading the book was was almost done with, and started another.  I played SIMS on the computer.  I didn't change out of my fuzzy polarfleece pants.

Tim, on the other hand, saved his blow-off day for today (Sunday).  He worked hard yesterday; measuring, cutting, shopping at Menards, and making me another grow stand to start my seeds.  I will now have room to start 25 flats, and the plants will have PLENTY of headroom when they get larger.  Last year, I had room to start 17 flats.
I ordered seeds yesterday, too.  I have a friend that loves to cook, and she loves hot peppers.  I sent her an e-mail to find out what kinds of peppers she would like for me to start.  She is pretty much the only person I know that likes hot peppers (besides my dad) so I basically grow hot peppers just for her.  Why not give her  the choice of which hotties I grow? I was hoping she would have an opinion, and not just tell me "whatever is fine...."
Thankfully, she had an opinion.  Ten years ago, she had gotten plants at the farmer's market.  She loved them, but had never found them again...
  • Bulgarian Carrot Peppers
  • Black Hungarian Peppers
  • Fish Peppers
Wouldn't you know, I found seeds for ALL of them at SeedSavers.org.  I ordered them all, and the shipping was only $1.90!  I could have probably asked my friend, who lives in Decorah, to pick them up for me.  But, for $1.90 shipping, it's hardly worth her trouble.  Apparently, all of those types of peppers are heirloom varieties, which makes me super excited to grow them.  For more on heirloom seeds/plants, please check out the link to Seed Savers Exchange.


Working with the Worms

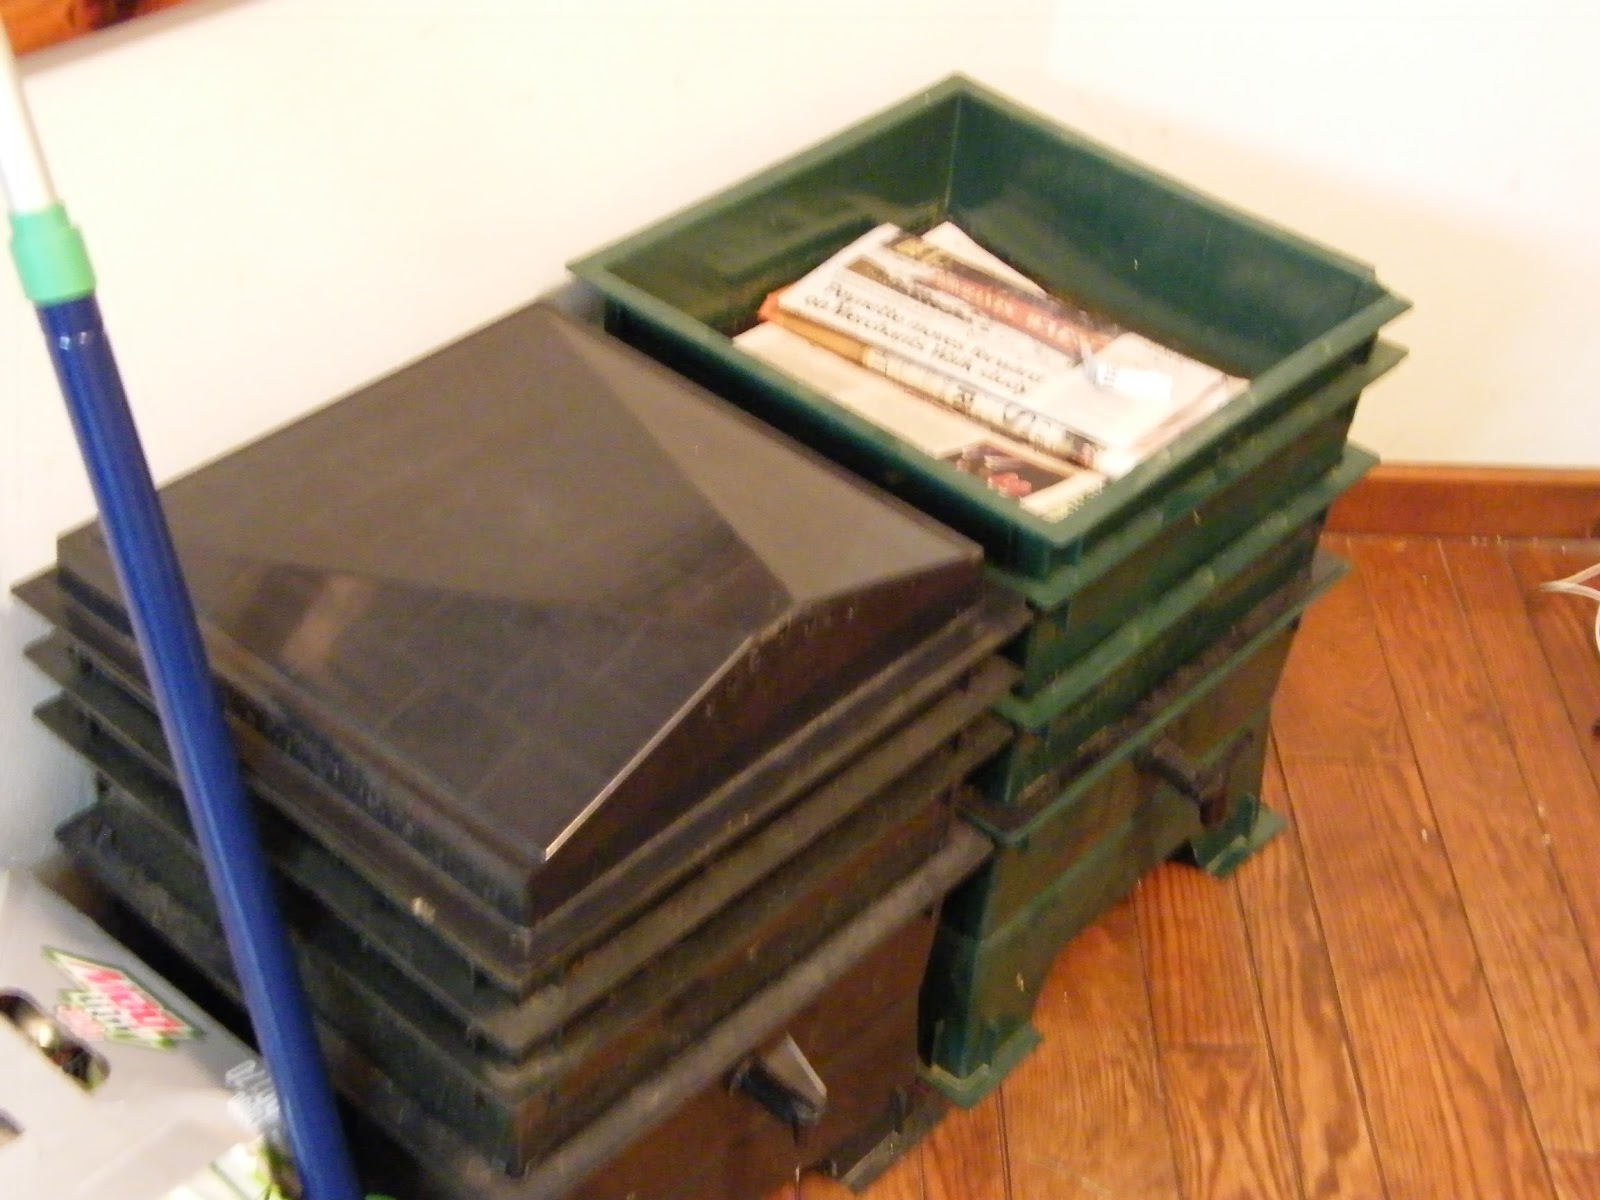
Although today was my blow-off day (see my post titled My wonderful gift!), I did spend about an hour getting new layers of bedding ready to start moving my worms up and out of the bottom level of my bins.
Here is how worms work: if you put the kitchen waste into a layer of bedding above the layer that they are in, they will move up in search of food when they've depleted the waste in the bottom level.  So, since they have pretty much outgrown the bottom level of my bins, I made new levels of bedding for them, and added just a little bit of waste to the middle level.  I prepared the bedding (made of shredded newspapers and coconut coir) on the top level, too, but I'll only add kitchen waste to that level when I know that my worms are smart enough to figure out how to migrate UP in search of food.  So far, no smell is coming from my worm bins, at all!


That little pod that is yellow? Worm cocoon!


Saturday, February 23, 2013

Time to start thinking about planting....

It's almost that time.  The winter is getting long.  That means it's time to start thinking about starting seeds.  Tim helped me bring up my grow stand last weekend (thanks, dear!) and we took one shelf out of it to give the seedlings some head room.  Last year, they got too tall.  I couldn't raise the light any higher, and the seedlings needed more head room.  So, even though I have one less shelf (which means I'll have four fewer flats started) I think that my seedlings will be healthier.
Getting ready for planting means that I also wanted to get my vermicomposting established again.  My worms had all died a couple of years ago because they got too hot.  I still had the two bins that I had started with, so I decided that I'd buy some red wigglers again when I had a little extra cash.  Like, $40 extra.  Didn't know that red wigglers were so pricey, did you?
As luck would have it, I found a booth at the Garden Expo in Madison that was for Growing Power.  I love the entire idea behind www.growingpower.org and I have for some time.  Will Allen is a pretty inspiring man, and his mission is one that I feel strongly about.  I was so excited to see that Growing Power is expanding to Madison, and there was a booth at the Garden Expo.  At the booth, there was a display about vermicomposting, and I asked where they got their worms.  Imagine my surprise when they told me that they had a bucket of worms (5 GALLONS!) for sale for only $25.... I snatched those babies up!
Now my worms are living in my dining room, and eating quite well.  I thought they might go on a little hunger strike since their environment has changed, but I don't see any sign of that.  Some of them have already had their babies, so I have some tiny little worms all ready to grow up big and strong.  Now, they had just better stay in their bins and not escape into my dining room.